My Summer Hair

IMAG0152-2012-05-16-13-39.jpg

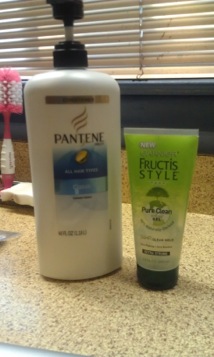
I’ve been experimenting with my hair a bit and I am completely thrilled with the results. The pictures below are from my latest flat twist-out. I conditioner washed my hair with some V05 Clarifying conditioner. I let me hair dry a bit before adding the Pantene Pro-V Classic conditioner as a leave it. My hair was instantly soft. I added a little of the Fructis Style Gel for a little hold. The gel is marked Extra Strong, but it has never done much for my hair. I was only using it to get it out of my hair supplies. I was really surprised at the results.

My hair has fantastic definition and just enough hold that I can get two days without restyling. This is perfect for me. I typically don’t go longer than that and I want products that have little buildup so I can re-apply with setting. I did get some flaking with the combination of these two but I know from past experience that this comes from the gel. A quick fluff and shake took care of the flaking but reapplication during the week did add more flaking till eventually it just stuck to my hair. I will no be purchasing this gel again, but the conditioner is my hair’s new best friend.

SummerNaturalHair2012-2012-05-16-13-39.jpg

As a style option, you just can’t beat the flat twist-out on my hair. They are quick to set, quick to take down and keep definition really well though fluffing and picking. I am anticipating a busy summer but I’m confident my hair will not cause me any problems. I just need to find a gel that doesn’t flake on me.

Paper Crafting Summer

This summer has started off to be the one that will be all about the paper crafts. In particular, card making.

Cardmaking-2012-05-15-16-08.jpg

The best thing about unemployment has been having the time and luxury to get back to some of things I love best. My time off has lined up perfectly with a friends desire to start card making. My friend DF has decided that she wants to make custom cards to give as Christmas gifts this year and she is being proactive and starting now. I’ve spent several days with her (and the occasional guest) in getting started on her goal.

This also made me want to do a little card making of my own. Recently, I attended the wedding of a family friend and since I am on a tight budget, I made her a set of handmade thank you cards.

Cardmaking1-2012-05-15-16-08.jpg

The base of the card is handmade paper that I have had in my stash for years not knowing exactly how to use. I stamped a silver background with a bronze thank you and accented with coordinating paper and brad. These are simple and elegant and a really nice option for sending a quick thank you. I had enough handmade paper to do a set of 20 cards. I bought coordinating sliver envelopes from the craft store. What bride won’t need extra thank you cards?

Cardmaking2-2012-05-15-16-08.jpg

And with that in mind, I continued on and made a set of 25 cards for my sister who is getting married in June. These were made by layering a piece of vellum over white card stock using eyelets and adhering to a card stock card of varying colors. There are five of each color for a set of 25. I know she will need more as she is still far enough out not to have purchased her thank you cards yet, but I want to send them to her to make sure she likes them before I send more.

And I still have more paper crafts up my sleeve before I pack the card stock and stamps away.

Reinvention by Maya Made

PastedGraphic2-2012-05-14-13-27.png

I preordered this book months ago. I have been following the Maya Made blog for quite some time and when she announced the publishing of her book, I ordered it immediately. When it landed on my doorstep and I was able to flip through it, I fell in love. There are several projects in it that I knew I wanted to make. Not just that, but projects that I needed in my home.

A few years ago, I bought this remnant decorator fabric with the purpose of making floor cushions. I didn’t know what pattern to use but in my head I wanted some of the square cushions with piping. The problem was the stuffing. Foam is expensive and clearly not in the budget right now. But Maya’s book gave an alternative I didn’t think of. *Silly Me!*

Why not make the cushion and use it as storage for blankets, quilts and other unused linens. And that is exactly what I did. I made two of the large Poufs out of the remnant fabric. One is stuffed with quilts. One is stuffed with extra curtains, pillowcases, etc. And now I have perfect little poufs that can be used for seating or casual foot props. Since making them, the coffee table in the den has become a nice little workspace for me.

ReinventionBookProjectPhotos-2012-05-14-13-27.jpg

Next up was the Summer Bolster. I made this out of two pillowcases that I had bought years ago to use in a sewing project that never came to be. Once I opened the pillow cases and sewed them together, I ended up with fabric longer than required, but I decided not to cut all of it off. A longer bolster is that much better in my opinion. I was glad I kept it. I rolled up the guest bed comforter and stuffed it inside. I used ribbon from my stash to tie up the two ends.
I’ll be making another one soon for the master bedroom.

ReinventionBookProjectPhotos1-2012-05-14-13-27.jpg

Since I was on a roll, I decided to pull out a few t-shirts that have been sitting in the corner waiting for a new life. I got most of these at Blissdom 2012 and added in a few more that have been in my bottom drawer unworn for years. I cut them apart and pieced them together using another remnant piece from my fabric stash as the backing. I did not add any batting as I wanted this to be a light summer lap throw, just a little something to drape when sitting in the air conditioning. I did not quilt it but I’m thinking about adding that latter when I am brave enough. I have more t-shirt pieces that will become another project soon. I’m just waiting for them to tell me what they want to be. :)

ReinventionBookProjectPhotos2-2012-05-14-13-27.jpg

If you are a sewer or ever so crafty inclined, you really should get this book.